Microsoft OneNote & WebMatrix
Microsoft OneNote
IBM Arabic Language Problem (Host integration Server)
IBM mainframe zSeries and midrange iSeries programs store data in visual or physical order, with the shapes laid out and reversed into Arabic blocks, that is, Englishcibara.
Microsoft® Windows® 32-bit applications store data in logical or spoken order, that is, EnglishArabic.
IBM DB2 of z/OS, and IBM DB2 for OS/400 are frequently configured to use EBCDIC code pages, for example EBCDIC 420 (Arabic). Microsoft® Host Integration Server includes support for most EBCDIC code pages for purposes of EBCDIC-to-UNICODE-to-ANSI, ANSI-to-UNICODE-to-EBCDIC, and EBCDIC-to-UNICODE-to-EBCDIC conversions.
With Host Integration Server, Microsoft SNANLS library converts strings (UNICODE< EBCDIC, ISO, OEMPC, ASCII, ANSI), typically performing a MultiByteToWideChar conversions, using system-provided National Language Support (NLS) tables.
What is Host Integration Server?
Microsoft® Host Integration Server helps customers integrate IBM host applications, data sources, messaging and security systems with new solutions developed using the Microsoft Windows Server System™ platform.
Host Integration Server and Arabic Support
The Microsoft® Host Integration Server team is committed to enabling Microsoft enterprise customers to integrate their line-of-business data stored on IBM mainframe zSeries and midrange iSeries computers with new solutions based on Microsoft Windows® desktop and server operating systems. Therefore, in Microsoft Host Integration Server, a bi-directional layout conversion for Arabic strings was added. This new TrnsBiDi library is called from the SNANLS library, when the features listed below are configured for host EBCDIC 420 Arabic coded character set identifier (CCSID). At runtime, the feature sends Arabic strings to SNANLS, then in turn to TrnsBiDi for processing. TrnsBiDi parses the strings, determining the storage order, based on direction of data movement, then transforms any visual segments to logical segments. The ability to parse and determine the storage order is estimated to be 95% accurate. This conversion is supported within the features listed below. This is also offered as a separate Win32 feature of the SNA Server Software Development Kit (SDK) by way of the TrnsBiDi.dll as part of the SNANLS API.
• SNA Print Service
• Transaction Integrator
• Managed Provider for DB2
• OLE DB Provider for DB2
• OLE DB Provider for AS/400 and VSAM
In this Blog, i will configure OleDB / ODBC connection with Mainframe for Arabic language support. Before this we need to do little changes in user locale to support Arabic language.
Setting the User Locale to Arabic and Installing Arabic EBCDIC Fonts
To set the user locale in Windows XP and Windows Server 2003
1. From the Control Panel, double-click Regional and Language Options to open the dialog box.
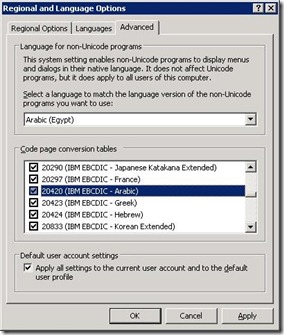
2. On the Regional Options tab, change the selected language to any Arabic country (Figure 1).
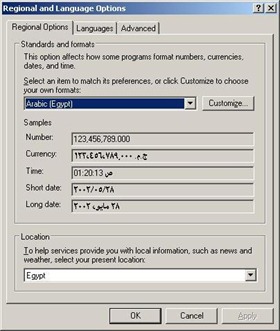
3. On the Advanced tab, change the Language for non-Unicode programs to any Arabic country (Figure2).
4. Choose 204020 (IBM EBCDIC – Arabic) from the Code page conversion tables list (Figure2).
5. Check the Apply all settings to the current user account and to the default user profile option and then click OK (Figure 2).
Configuring OLE DB and ODBC Provider for Arabic Support
Note: Host integration Server 2004/2006/Latest version must be installed to do the following configuration.
Microsoft® Host Integration Server provides efficient data integration support for IBM DB2 databases, mainframe, and AS/400 file systems. Host Integration Server offers a new DB2 network protocol client (DRDA AR) over which the ODBC, OLE DB, and managed data providers communicate with the remote DB2 database server. A new Data Access Tool is also provided to create and manage connection definitions to DB2 and host file systems.
To create new data source:
1. In the Data Access Tool right-click Data Sources, and then click New Data Source.
2. On the Welcome to the Data Source Wizard page, click Next.
3. Select the data source platform from the dropdown menu, select a network type then click Next.
4. Configure your network parameters as desired.
5. Configure your data source parameters as desired.
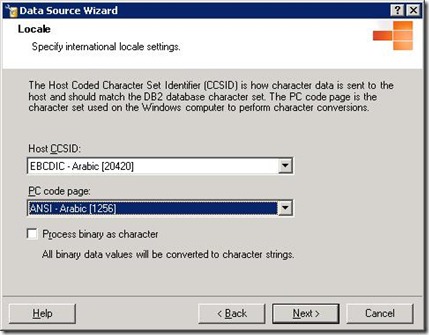
6. On the Locale screen select your host CCSID and PC Code Page. Normally it should be EBCDIC – Arabic [20420] for host CCSID and ANSI – Arabic [1256] for PC Code Page as shown in Figure
7. Click Next.
8. Configure Security and Advanced Options parameters as desired.
9. Validate your connection, create the required packages, and then click Next.
10. Type a Data Source name and choose a Data Source type then click Next.
11. Click Finish.
That’s all. Now, you can use this ODBC or OLE DB connection as a data source to communicate with IBM Mainframe. Well i used it with SQL Server Integration Services(SSIS) in Business intelligence Development Studio (BIDS) IDE to get data from Mainframe-DB2.
Note: HostFront Enterprise Server provides full Arabic EBCDIC code page 420 (XBASIC) support to IBM mainframe zSeries and midrange iSeries host environments making it the perfect companion to Microsoft Host Integration Server and BizTalk® Server.
Technorati Tags: Host integration Server,HIS,IBM Arabic,Mainframe Arabic Support,Reading Data from Mainframe IBM,SQL integration Services,using BI Services in SQL Server 2008,Codepage problem in Mainframe,Locale settings for IBM,ODBC connection for Mainframe IBM.
Installing Team Foundation Server 2008
I installed Team Foundation server 2008 (TFS 2008) Single on Windows server 2003 Enterprise Edition. Well it is Single Server Deployment and i used Virtual Machine for testing environment. Before we going into detail step for installation, First thing first, which mean Pre-Requisite for installing Single Server Deployment of TFS 2008.
Single Server Deployment Pre-Requisite
A single-server deployment of Team Foundation Server means that you install the application-tier and data-tier components on a single server that is joined to a domain or a workgroup. (In this post, i am doing it on Workgroup. Well, its same for Domain, just need to create Domain User accounts instead of creating local account. But keep this thing in mind that you cannot install TFS 2008 on domain controller. To do this you need to raise the windows 2003 Forest functional level, To Read more about it See the Article Domain Functional Level).
- Required Accounts:
You can create separate accounts for TFS Setup (TFSSETUP) TFS Service (TFSService) and WSS Services(WSSService) or you can use built in account of local user or network service account.
If you install and configure Team Foundation Server on a single server that is a member of a workgroup, you can use local user accounts instead of domain user accounts as the service accounts. (This is what i used.)
2. Internet Information Services (IIS)
On servers that are running Windows Server 2003, you can use Control Panel to install Internet Information Services (IIS) 6.0. In addition to the default options, you must configure IIS 6.0 with these options:
ASP.NET must be enabled.
FrontPage 2002 Server Extensions must not be installed. (SharePoint Products and Technologies is incompatible with FrontPage Server Extensions.)
The IIS 5.0 isolation option must not be enabled.
3. SQL Server
install SQL Server with the specified options for a deployment of Visual Studio Team System Team Foundation Server. If you have an existing installation that meets these requirements, you do not need to install SQL Server. I install SQL Server 2005 Enterprise Edition with Analysis Services and Reporting Services. During Installation Wizard, on Reporting Server Installation option page, Click Install but do not configure server, and click Next TFS will configure the reporting server for you.
4. SharePoint Product & Technologies
You must install SharePoint Products and Technologies as a part of the logical application tier for Team Foundation Server. To meet this requirement, you can install Windows SharePoint Services 3.0 or Microsoft Office SharePoint Server 2007.
You can install it before TFS installation, or WSS can also be installed as part of the TFS installation.
if you already have SharePoint installed, then you must know the Base URL addresses for the Central Administration site and Default Site with port numbers. During installation you will need this other wise TFS will not be installed.
Single Server Deployment Installation
Following procedure will guide you through installation wizard, but be sure that you already have Pre-Requisite installed.
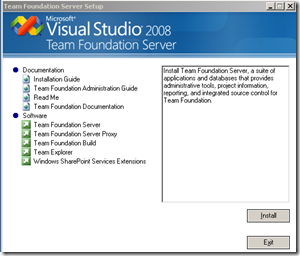
Select Team Foundation Server and Click Install …
In Next Screen, Supply Product Key and Accept the terms and Click Next
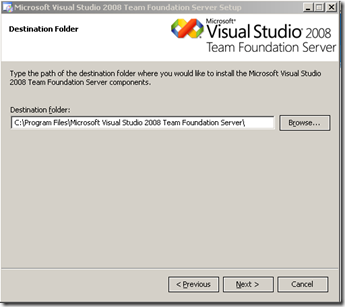
Select the Installation path and Click Next to continue…
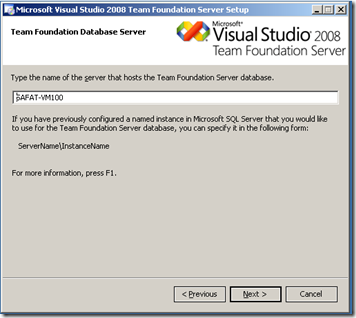
Type the name of database SQL Server, and click Next …
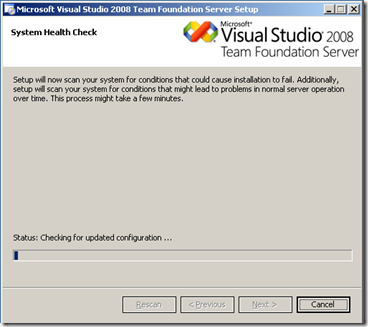
Setup will do the Health Check of your System, After it if the System health check is ok then Click Next to Continue otherwise click on "Click Here" to see and resolve the issues. And then again Re-Scan and Click Next…
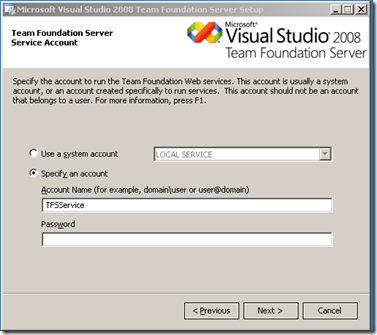
Provide the Service Account, which you created in local user group to run the service, you can also select use a System Account option and use Local Service or Local User Account. click Next…
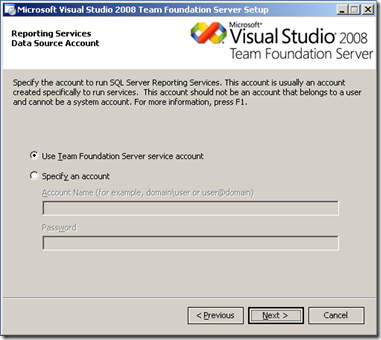
On this screen you can continue with First option if you want to use the same account as you mentioned in previous screen but if you created separate account for it then specify it and click Next … (I select the First option)
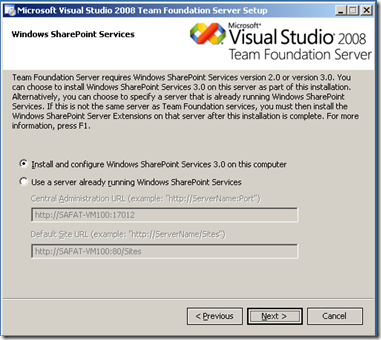
If WSS or MOSS are already installed then select the 2nd option and provide the Base URLs for central administration and Default site. Otherwise select the first option to install and configure the WSS 3.0 on the system. I selected the 2nd option and provide the URL with port numbers and when you click Next it will validate the URLs and then move on.
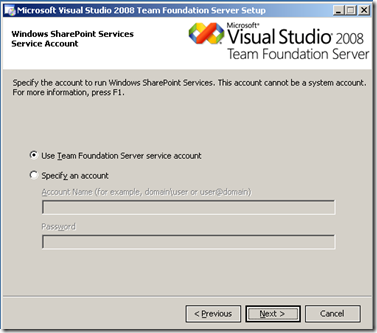
On this screen specify the account which you created for WSS services or use the first option to go with the TFS Service account. I selected the first option and Click Next…
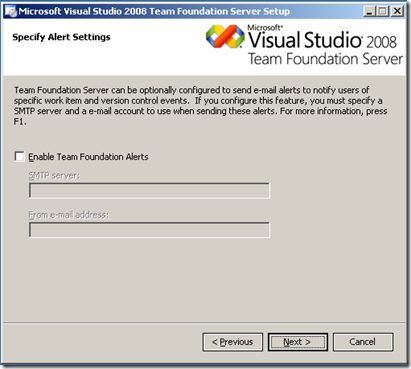
If Email Server is configured which I don’t have in this case , select Enable option and specify server address and email address here otherwise leave it unchecked and click Next.
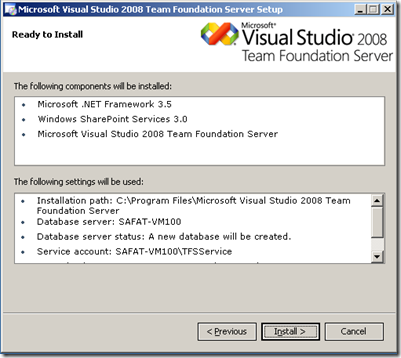
It will display you the ready to install screen to review and Click Install to continue. If SharePoint (WSS or MOSS 2007) is already installed then Windows SharePoint Services 3.0 option would not be there, otherwise it will install and configure WSS 3.0 during setup.
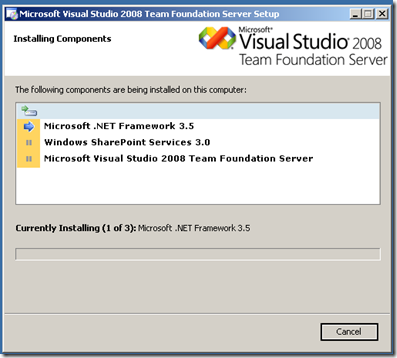
This screen will appear, wait until it finish installation. Again the components in the list depends on if it is previously installed or not.
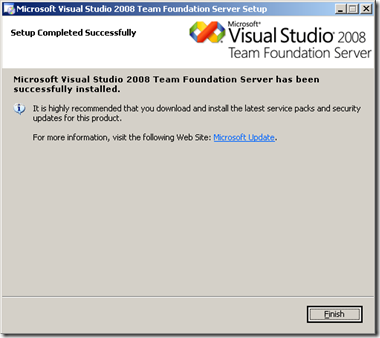
At the End it will come up with the Completed Successfully screen. Just Click Finish to end the installation Wizard. (It will ask to Restart the Windows, So Restart!..)
Understanding Content Types
A content type is a reusable collection of settings you want to apply to a certain category of content.Content types are designed to help users organize their SharePoint content in a more meaningful way.
Continue Reading February 26, 2009 at 8:33 pm Leave a comment
